What was required by the birthday recipient was a ‘simple cake’, really just for the sake of a cake to celebrate his birthday amongst friends. What was required was a fluffy sponge, flavoured with chocolate, and a filling of chocolate for those celebrating his birthday with him. For the himself, a white chocolate element was essential, as this is his preferred chocolate of choice. What immediately sprang to mind was a modified version of the classic chocolate birthday cake, with the topping replaced by a white chocolate ganache. In other words, a simple chocolate celebration cake for all occasions, made with classic components: chocolate Génoise type sponge, classic chocolate crème mousseline, and a white chocolate ganache.
A Génoise type sponge is an essential tool in any pastry chef’s toolbox. It is a classic in its own right. It is used as a base for all types of celebration cakes, jellyrolls, elegantly decorated petit fours, and a wide range of desserts. It is the most versatile and widely used type of French cake. It is a true sponge cake; it is simply trapped air. A good Génoise is fine textured, yet strong, or firm, and tender at the same time. The purpose of a Génoise type sponge is to support other elements and flavours. It is perfect for unlimited dessert creations. Traditionally, desserts built using a foundation of Génoise are delicate and refined, just as a classic should be. The chocolate version follows a similar pattern. It has a light, delicate chocolate flavour and colour (note that it not meant to be heavy, dark and moist as is the case with some other cake types). It is especially good in combination with other chocolate creams or ganaches.
A classic chocolate crème mousseline is a pastry cream that has been whipped with soft butter until it is lighter and more structured. It tends to be used when the cream component of the recipe needs to stand, or hold up, such as when a cake is cut.
Ganache, also known as crème ganache, is an emulsion of chocolate and butterfat, either in the form of cream and/or butter. Ganache can be used as a cake filling, a topping, as icing, or as a glaze. It is a very versatile pastry and dessert component. Ganache is based upon dark chocolate. This variation is made with white chocolate.
White chocolate differs from dark chocolate (70% cocoa solids) which has little or no milk solids; it has neither chocolate liquor (other than cocoa butter) nor cocoa solids (other than cocoa butter fats), it contains only cocoa butter (approximately 30%), sugar (approximately 55% maximum) and milk solids (14%). Compared to dark chocolate, it is richer, smoother, sweeter and has a buttery, milky taste; it contains more fat, and it has a different sensitivity to heat (it melts more easily and at a lower temperature, and may burn more rapidly). As a consequence of the lack of cocoa solids, or, put another way, due to its increased fat content, comparatively less liquid (approximately half) is required when making a white chocolate ganache.
A basic white chocolate ganache is made up of just two ingredients: white chocolate and cream. It is a multi-purpose emulsion that can be used in many ways. Apart from being the most important filling for cakes and chocolate confections, ganache is one of the most versatile components available to the pastry maker through its available, and variable, consistencies. However, what is apparent is that working with white chocolate is trickier than working with dark chocolate.
The master, or basic, white chocolate ganache has a ratio (always based on weight) of: 2 parts white chocolate to 1 part cream, and is a medium-textured ganache (white chocolate ganache is softer than a dark chocolate ganache). Usually a firm-textured ganache is used in making toppings. However, that is not the case here, where medium textured white chocolate ganache is used. There is one other main variable: the temperature at which the finished ganache will be served. So, depending on its purpose, the ratio of chocolate to cream can be varied to obtain the desired consistency. When the temperature of a ganache is changed, its properties change: it becomes thinner as it is heated, and thicker as it is cooled. When the ganache is at just above room temperature, a liquid ganache can be poured over a cake to form a smooth and shiny glaze. A thick coating of ganache will harden into a paste or dough-like consistency on cooling.
The white chocolate ganache is made dairy free with the use of Hemp milk, specifically Hemp milk Heavy cream. This is considered as a store item and will need to be made ahead of time.
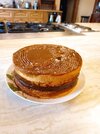
This recipe makes a two layer 23cm (9in) diameter Simple chocolate birthday cake.
When finished, place the glazed Simple chocolate birthday cake back into a refrigerator, so that the white chocolate ganache may set.
If the cake is to be decorated, leave it in the refrigerator for a minimum of 30 minutes before removing and then making any decoration on the chocolate frosted surface.
Replace the finished Simple chocolate birthday cake in a refrigerator until it is time to eat.
Enjoy.

Edit: correct picture of cake added.
A Génoise type sponge is an essential tool in any pastry chef’s toolbox. It is a classic in its own right. It is used as a base for all types of celebration cakes, jellyrolls, elegantly decorated petit fours, and a wide range of desserts. It is the most versatile and widely used type of French cake. It is a true sponge cake; it is simply trapped air. A good Génoise is fine textured, yet strong, or firm, and tender at the same time. The purpose of a Génoise type sponge is to support other elements and flavours. It is perfect for unlimited dessert creations. Traditionally, desserts built using a foundation of Génoise are delicate and refined, just as a classic should be. The chocolate version follows a similar pattern. It has a light, delicate chocolate flavour and colour (note that it not meant to be heavy, dark and moist as is the case with some other cake types). It is especially good in combination with other chocolate creams or ganaches.
A classic chocolate crème mousseline is a pastry cream that has been whipped with soft butter until it is lighter and more structured. It tends to be used when the cream component of the recipe needs to stand, or hold up, such as when a cake is cut.
Ganache, also known as crème ganache, is an emulsion of chocolate and butterfat, either in the form of cream and/or butter. Ganache can be used as a cake filling, a topping, as icing, or as a glaze. It is a very versatile pastry and dessert component. Ganache is based upon dark chocolate. This variation is made with white chocolate.
White chocolate differs from dark chocolate (70% cocoa solids) which has little or no milk solids; it has neither chocolate liquor (other than cocoa butter) nor cocoa solids (other than cocoa butter fats), it contains only cocoa butter (approximately 30%), sugar (approximately 55% maximum) and milk solids (14%). Compared to dark chocolate, it is richer, smoother, sweeter and has a buttery, milky taste; it contains more fat, and it has a different sensitivity to heat (it melts more easily and at a lower temperature, and may burn more rapidly). As a consequence of the lack of cocoa solids, or, put another way, due to its increased fat content, comparatively less liquid (approximately half) is required when making a white chocolate ganache.
A basic white chocolate ganache is made up of just two ingredients: white chocolate and cream. It is a multi-purpose emulsion that can be used in many ways. Apart from being the most important filling for cakes and chocolate confections, ganache is one of the most versatile components available to the pastry maker through its available, and variable, consistencies. However, what is apparent is that working with white chocolate is trickier than working with dark chocolate.
The master, or basic, white chocolate ganache has a ratio (always based on weight) of: 2 parts white chocolate to 1 part cream, and is a medium-textured ganache (white chocolate ganache is softer than a dark chocolate ganache). Usually a firm-textured ganache is used in making toppings. However, that is not the case here, where medium textured white chocolate ganache is used. There is one other main variable: the temperature at which the finished ganache will be served. So, depending on its purpose, the ratio of chocolate to cream can be varied to obtain the desired consistency. When the temperature of a ganache is changed, its properties change: it becomes thinner as it is heated, and thicker as it is cooled. When the ganache is at just above room temperature, a liquid ganache can be poured over a cake to form a smooth and shiny glaze. A thick coating of ganache will harden into a paste or dough-like consistency on cooling.
The white chocolate ganache is made dairy free with the use of Hemp milk, specifically Hemp milk Heavy cream. This is considered as a store item and will need to be made ahead of time.
This recipe makes a two layer 23cm (9in) diameter Simple chocolate birthday cake.
Ingredients:
Chocolate génoise type sponge 2 layers
Classic chocolate crème mousseline filling
White chocolate ganache
Pre-Day
This concerned with making the Hemp milk Heavy cream.
Hemp milk Heavy Cream
Ingredients: (makes approximately #600g)
Butter (sliced) 125g
Hemp milk 180g plus 1Tbsp Hemp milk
Gluten-free flour mix 2* 8g (to thicken the liquid)
Cane sugar 4g
*Gluten-free flour mix 2: 440g White Rice flour, 125g Sweet Rice flour, 45g Potato starch, 95g Tapioca starch, and 55g Arrowroot. Total weight: 760g
Method:
Place 125g sliced butter in the bowl (1) of a double boiler, gently heat until three quarters of the butter is melted, stirring with a spoon. Remove from heat and melt the rest of the butter with a spoon. Set aside the bowl to cool.
In another bowl (2), warm the Hemp milk just to finger warmth (36 - 37°C) and then remove from the heat.
Pour half of the warmed Hemp milk into the cooling melted butter and combine with a hand whisk.
Pour the butter-milk mix back into the warmed Hemp milk and combine with a whisk.
In a small bowl (3), mix 8g Gluten-free flour mix* with 4g cane sugar and 1Tbsp Hemp milk, and combine with a small whisk, and then pour the mix into the milk-butter mix (bowl 2), and combine to thicken.
Transfer the thickened milk-butter mix into a tall storage jar. Blend with a hand, or stick, blender for 5 minutes. This is to disperse the butterfat globules into the Hemp milk liquid to produce the Hemp milk Heavy cream.
Place a lid on the storage jar and store in a refrigerator for 20 – 30 minutes before use. It will keep for several days in the fridge. However, fat absorbs odours easily. Hence avoid storing cream in a refrigerator containing foods with a strong odour.
Day
This is concerned with: making the Chocolate génoise type sponge layers; the classic chocolate crème mousseline filling; assembling the cake with the filling; making the White Chocolate ganache; applying the ganache; and, if required, applying any decoration.
Chocolate génoise
This Gluten-free recipe is for a round chocolate génoise. It is based upon the Gluten recipe of Bruce Healy and Paul Bugat (The Art of the Cake, (New York, William Marrow and Company, Inc, 1999), yet with a modified method that is influenced both by Shirley Corriher in, BakeWise: The Hows and Whys of Successful Baking with Over 200 Magnificent Recipes, (New York, Scribner, 2008) and Sherry Yard in The Secrets of Baking, (New York, Houghton Mifflin, 2003).
It will be noted that in the recipe below that extra egg yolks are added to the whole eggs (a génoise normally calls for just whole eggs). This is to obtain the stable egg foam needed to produce a successful génoise. The reasoning as given by E J Pyler in Baking Science and Technology (as quoted in BakeWise) is that modern eggs may be deficient in yolk proteins so it is common practice to add 20 – 50% more yolks to improve both aerating ability and foam stability. Also, E B Bennion states in The Technology of Cake Making (again quoted in BakeWise) that the best quantity of yolks to add is 20% for similar reasons. On top of this there are two approximate rules for génoise recipes: the weight of the flour (including cocoa powder) and sugar to be close to equal; and the amount of sugar to be less than 1.25 of the weight of the eggs. This recipe falls within both guidelines, with the ratio of sugar to eggs being 0.59; well below the 1.25 limit.
Ingredients: (makes two 23cm (9in) round génoise layers)
Gluten-free flour mix* 180g
Cocoa powder (alkaline) 45g
Butter (optional) 45g (sliced and cubed)
Cane sugar 220g (11 + 209g)
Eggs 398g (7 Large plus 3 yolks)
*Gluten-free flour mix: 440g Brown Rice flour, 125g Sweet Rice flour, 45g Potato starch, 95g Tapioca starch, and 55g Arrowroot. Total weight: 760g
Method:
Lightly grease two 23cm (9in) round cake pans (3.5cm (1 3/8in) high) with softened butter. Line the bottom and the sides up to the top of the pan with parchment paper, and then lightly grease with softened butter.
Adjust a rack to the middle of the oven, and preheat the oven to 190°C for 45 minutes.
Sift the gluten-free flour mix and cocoa powder into a medium sized bowl (1), add in 1Tbsp (11g) cane sugar, and whisk to incorporate. This is to help later when folding in the flour with the whipped egg mixture; it will make it easier. Set aside.
If adding the optional butter, fill a medium saucepan (2) with about 5cm (1in) of water and over medium heat bring to a simmer. Place a small bowl (3) on top containing the sliced and cubed butter. Using a metal dessert spoon, melt the butter, when it is approximately three quarters melted, remove the bowl from the heat and continue to stir to completion. Set aside.
Rinse a stand mixing bowl (4) with hot tap water to warm it, then dry well.
If not already done so, fill a medium saucepan (2) with about 5cm (1in) of water and over medium heat bring to a simmer.
Add the eggs and yolks to the warm mixing bowl (4) and break the yolks with either a fork or a whisk; add the rest of the cane sugar and whisk to combine for a minimum of 30 seconds. Then, place the warm, filled mixing bowl (4) on top of the saucepan (2) containing the simmering water; turn the heat to low. If whipping by hand, tilt the mixing bowl forward, almost horizontal, and sweep the whisk around the bottom of the bowl, with each revolution lifting the whole of the mass of egg mix to incorporate air into the process. If using a hand-held mixer, use a similar process. Whisk continuously for 3 – 4 minutes, or until the egg mix reaches a temperature of 40°C and the mix is frothy and pale yellow.
Remove the filled mixer bowl (4) from the double boiler and wipe the bottom dry. Place the filled bowl on a stand mixer fitted with a whisk attachment, or use an electric mixer. Whip at medium speed for 12 – 17 minutes, until the egg-sugar mixture is three times the original volume, is thick, is almost white in colour, and is completely cool to a finger dipped in it. During the last 4 – 5 minutes of whisking stop from time to time to check the ribbon thickness when dropped from the whisk. There will be some definition of it in the filled bowl, it will initially stay on top of the mixture before spreading slightly and slowly flattening as it dissolves into the mass of whipped egg-sugar mix.
Turn the speed down to the lowest, then drizzle in the cooled, yet liquid, melted butter (bowl 3) and mix for 15 seconds until incorporated. If the butter has cooled too much and it is no longer liquid, place it in a microwave oven and briefly heat to liquify.
Sift a quarter of the Gluten-free flour mix over the top of the whipped egg-sugar mix, avoiding the edges of the bowl. Imagine a clockface. Gently immerse a whisk vertically into the foam, facing forward at the 12 o’clock position and drag it across the bottom of the bowl. At the 6 o’clock position, lift up the whisk, and with it a large dollop of the mix, turn it over and spread it across the top of the sifted flour, folding the flour into the mix. Rotate the mixer bowl one quarter turn, sift another quarter of the flour mix and fold again. Repeat with the third batch of flour, and again with the last quarter of sifted four mix and folding that in to fully incorporate the flour into the cake batter.
Pour and scrape the cake batter into the prepared cake pans, filling them to between one third and three quarters of their height. Tap each pan lightly on the worksurface a few times to eliminate any air bubbles. Then, smooth the surface of the batter with a spatula, pushing it out to the sides to make a slight depression in the centre.
Place the filled cake pan on a baking sheet on the middle shelf of a preheated oven and bake for 16 – 20 minutes, or until the chocolate génoise starts to pull away slightly from the sides of the pan, and is firm to the touch. As an additional test, place the tip of a paring knife in the centre of the cake, and if it comes out wet yet clean, the chocolate génoise is done. If it doesn’t, bake for a further 5 – 10 minutes.
Remove the chocolate génoise from the oven, place it on a wire cooling rack, and slide the tip of a paring knife between the edge of the chocolate génoise and the cake pan; to fully loosen the edge. Let the chocolate génoise cool in the pan for 15 minutes. Unmould the chocolate génoise on to another wire cooling rack covered with a sheet of parchment paper. Remove the parchment paper that the chocolate génoise was baked on and cool right side up for at least 2 hours before using.
Chocolate génoise may be kept at room temperature for up to 2 days, or covered airtight in a fridge for 2 days too. Alternatively freeze for up to 2 weeks in a freezer. If frozen, defrost overnight in a refrigerator, then unwrap the chocolate génoise for at least 2 hours before using.
Classic chocolate crème mousseline
The Chocolate crème Mousseline recipe is based upon the recipe for a Classic Crème Mousseline given in Baking, (Berkeley, Ten Speed Press, 2009) by Peterson J. The method is heavily influenced by that of Healy B, and Bugat P in The Art of the Cake, (New York, William Marrow and Company, Inc, 1999). The method uses the less popular way of creating a crème mousseline, that of creaming the warm butter before adding the room temperature pastry cream. This method is less prone to curdling, looking grainy or splitting. However, if that should occur, guidelines are given for overcoming this effect.
Ingredients: (enough for one generous layer in a 23cm (9in) cake)
Butter (room temp, chopped) 170g
Cane Sugar 50g
Eggs 64g (1 large egg plus 1 large egg yolk)
Cornstarch 2Tbsp plus 1 1/2tsp
Hemp milk 240g
Vanilla essence 1/2tsp
Dark chocolate 57g (chopped)
Gelatin (approximately 1 sheet (2.5g) per 120g of wet mix)
Method:
Take the butter out of the refrigerator, at least 30 minutes before use, and bring it up to room temperature.
In a large bowl (1) add sugar, egg, and yolk, and whisk together for at least 30 seconds (otherwise the egg yolks will burn due to the acid in the sugar), to form a smooth, lemon coloured mixture. Whisk in the cornstarch until the mixture is smooth.
In a small saucepan (2) over medium heat, add the Hemp milk and Vanilla essence, and bring the milk to a gentle simmer, yet avoid boiling.
Add the chopped chocolate to the simmering Hemp milk and vanilla essence (saucepan 2), stir to melt and blend in (at least for two minutes).
Turn off the heat. Slowly pour half of the hot milk (saucepan 2) into the egg mixture (bowl 1) and stir constantly with a wire whisk. This is called tempering, and is a method of easing two components with widely different temperatures to cook together and prevent premature coagulation: to control the rate of protein folding and reconnecting.
Pour the resultant mixture (2) back into the saucepan (1) containing the remaining hot milk mixture and whisk together to combine.
Turn heat back on to medium-low, for even unfolding and reconnection of the egg proteins, and stir the pastry cream mixture with a wooden spoon until it is thoroughly blended and smooth. Make sure that wooden spoon reaches everywhere - bottom, sides, and corners, so that the mixture does not burn. Keep the spoon in constant motion. Once you sense that the mixture is slightly thick on the bottom of the saucepan (look at bottom of spoon), remove it from the heat. Once the mixture has reached 75 – 77°C the egg proteins reattach and solidify. Heating above 77°C will result in an ‘eggy’ taste to the custard. The thickened mixture should thickly coat the back of the wooden spoon.
Off heat, continue stirring the pastry cream mixture for a further minute, until the mixture is thick, smooth and uniform (this allows a slow and even coagulation of the eggs and will produce a creamy texture).
Return the saucepan to the heat and cook for a further 1 – 2 mins to overcome any resultant starch flavour.
Bloom the gelatin sheets in a bowl (4) of cold water for approximately 10 minutes until softened. Drain off the water from the gelatin sheets. Melt the gelatin in a microwave oven for 2 – 3 x 10 second bursts on full power.
If using gelatin powder, place 2tsp of powder into a small bowl (4), add 4Tbsp of cold water, whisk quickly so that all of the granules are surrounded by water, or clusters will appear. After 5 minutes of whisking, the mixture should bloom and become spongy; then allow to thicken for 5 minutes. To melt, either use the method above for gelatin sheets, or, stand the bowl in another, larger bowl (5) of hot water and stir until all the gelatin is dissolved. Cool slightly.
Drizzle the melted gelatin into the pastry cream mixture (bowl 2) and whisk until well-mixed.
Line a baking tray with clingfilm, and pour the pastry cream into this, ensuring that it is thinner than 5cm (2in) in thickness. Allow the pastry cream to cool to room temperature. Check the bottom of the baking tray, it is cool when the bottom of the baking tray feels cold. To speed up the process, cover with another sheet of clingfilm and place in a refrigerator. The pastry cream should be thick, creamy, and smooth, indicating that the fat, in the butter, milk, and eggs, has been properly emulsified with the water in the milk and eggs.
Remove the top layer of the clingfilm. Using a rubber, or silicon spatula roll up the pastry cream to one end of the baking tray and scoop into a bowl.
If not already at room temperature, bring the Pastry cream up to room temperature, this will take approximately 30 minutes.
In the bowl (3) of a stand mixer add the sliced and cubed butter, fit the mixer with a whisk or flat paddle attachment (a flat paddle type attachment will produce a smoother mousseline with fewer bubbles). To fully aerate the butter, and thus establish a stable emulsion when the custard is added, beat at medium speed until it is smooth, pale in colour, and creamy, about 3 minutes. Scrape down the sides and bottom of the bowl. At the slowest speed, slowly add in the cooled custard (one tablespoon at a time), beating until the cream is light and creamy. Beat for a further 3 – 4 minutes, at the end, until it is totally homogeneous and creamy.
If the chocolate crème mousseline looks grainy, or splits, there are a few measures to regain a smooth crème mousseline. First, using the flat paddle attachment, beat for a further 5 minutes at medium speed until smooth. This will help in warming up the butter and allowing the pastry cream to cool; bringing both to a similar temperature. If that is unsuccessful, place the mixing bowl over low heat for 15 – 20 seconds (to get a little of the crème mousseline to melt), then beat again for 5 minutes. This may need repeating once or twice to get the mousseline smooth.
Use immediately, or keep, tightly covered with clingfilm, in a refrigerator for up to three days. To use, bring up to room temperature and whip the chocolate crème mousseline first, so that it can aerate.
Once cool, and if not using immediately, cover the surface with wax paper, or buttered parchment paper (this will ensure that the pastry cream does not form a skin). Refrigerate for up to 3 days. Classic chocolate crème Mousseline cannot be frozen, as the starch and protein bonds will break down. Also, in the process of defrosting, the Classic chocolate crème Mousseline will weep, producing moisture, resulting in a runny, rather than stiff, consistency.
Assembly 1.1
To assemble the cake, first, cut three or four strips of wide (enough to fit under edge of cake and overlap plate edge, all the way round) parchment paper; place on top of one of the chocolate génoise layers, place a plate on top, and invert so that the flat, baked bottom of the chocolate génoise layer is on top, and the plate is on the bottom. Secondly, invert the other layer onto a parchment covered cooling rack, again with the flat, baked bottom of the chocolate génoise layer on top.
After making the classic chocolate crème mousseline filling, spread it generously over the first (cake layer on plate) flat surface, starting around the outer perimeter, going right to the edge; finally, place any chocolate crème mousseline left into the centre of the cake surface. Spread the cream evenly with a thin metal spatula, smoothing the cream in towards the centre.
Then, place the other cake layer, with the flat side uppermost, on top of the layer of crème mousseline filling. Press down to firm up the filling, to force it right out, even outside of the cake. Then, using a thin, offset metal spatula, clean up any excess filling and smooth the filling edges flat to the cake layers.
Place the filled cake in a refrigerator to firm up the classic chocolate crème mousseline filling.
White chocolate ganache
This recipe is based upon that given in Sherry Yard’s book: The Secrets of Baking, (New York, Houghton Mifflin, 2003) for a White chocolate ganache.
Master, or basic White chocolate ganache (medium-textured)
Ingredients:
White chocolate 490g (sliced and chopped into small pieces)
Hemp milk Heavy cream 240g
Honey (optional) 1Tbsp
Method:
Chop the white chocolate into 6mm (1/4in), maximum, pieces, and set aside.
In a saucepan (1), add the Hemp milk Heavy cream and, over medium heat, bring it just to a boil; reduce the heat, and simmer (between 73 and 85°C) for 2 minutes, stirring occasionally with a wire whisk to prevent the Heavy cream from boiling over. Remove from the heat.
Add the chopped white chocolate to the hot cream (adding it in this order will greatly reduce any chance of the ganache splitting), and allow the chocolate to sit for 1 minute, then using a rubber, or silicon, spatula, slowly stir the mixture in circles, starting in the centre and moving outwards to the side, and taking care to avoid incorporating air whilst stirring. Stir for a minimum of 2 minutes to ensure that all of the chocolate is incorporated and the mixture is fully emulsified. If necessary, place the saucepan of white chocolate ganache back on a low heat source and melt the chocolate to keep it from cooling and solidifying, and thus ensure that all of the chocolate is incorporated.
Line a baking tray with clingfilm, and pour the ganache into this, ensuring that it is thinner than 5cm (2in) in thickness. Or, pour the white chocolate ganache into a jug, and place this in a bowl of cold water. Allow the ganache to cool to 21°C, then it is ready to use as a topping. At between 29 – 32°C the ganache is ready to pour onto a cake surface, and drip. Remove the top layer of the clingfilm. Using a rubber, or silicon spatula scoop the ganache into a bowl (4).
Once cool, and if not using immediately, cover the filled bowl and refrigerate for up to 2 weeks.
Assembly 1.2
Remove the filled cake from the refrigerator.
When the temperature is between 29-32°C, pour a little of the white chocolate ganache on to the middle of the cake surface, and spread around, to evenly crumb coat the cake surface (filling in any depressions, etc, so that the surface is level). Allow this to set.
Slowly pour the white chocolate ganache into the middle of the cake surface, allow the ganache to flow outwards before applying a little more. Repeat this process, encouraging the flow out to the edges (yet not over) with a spatula, until it is all used up. If any of the ganache escapes over the edge, wipe it up with a paper towel.
Place the white chocolate ganache back into a refrigerator, and allow it to cool. When cooled, remove white chocolate ganache from the refrigerator, check the temperature, the ideal temperature for spreading is approximately 21°C, or when it has the consistency of peanut butter. First, stir it with a silicon spatula to soften it, and allow it to come up to 23°C, if necessary, gently melting it in a bowl over a saucepan containing a small amount of simmering water, and then cooling. Remember that in winter it will cool very quickly if the ambient temperature is below 22°C. And note that in these conditions, it may be necessary to warm it to start with; and the ganache cools rapidly when using.
Centrally, place a small amount (‘dob’) of the ganache (to anchor the cake whilst icing) on top of a cake turntable, or ‘lazy Susan’, or similar; cover with four wide strips of parchment paper to form a rectangle of strips that extend outside of the cake (this is to catch excess ganache icing, smears, etc.); and place the cake on top.
Using a straight metal icing spatula, place a large amount (“dollop”) of white chocolate ganache on the top surface of the cake. Using a back-and-forth motion, and working quickly, spread the ganache evenly over the top surface, circumferentially, and ensure that ganache extends over the cake edges. Layer on more ganache to cover any gaps. Smooth the ganache following the contours (slightly domed) of the cake top.
Work quickly as the chocolate ganache cools rapidly.
When finished, place the glazed Simple chocolate birthday cake back into a refrigerator, so that the white chocolate ganache may set.
If the cake is to be decorated, leave it in the refrigerator for a minimum of 30 minutes before removing and then making any decoration on the chocolate frosted surface.
Replace the finished Simple chocolate birthday cake in a refrigerator until it is time to eat.
Enjoy.
Edit: correct picture of cake added.
Attachments
Last edited:
