Following Laura's idea of an infrared coffin mentioned here, we started building the contraption. It is very much like a tanning bed except that instead of generating UV lights, it generates near infrared lights.
I didn't know that we would publish such a project, so I only have pictures of the finished product. But if one of you wants to build such a device, it's not too complicated. I provided some explanations in the photo tour below and I can provide extra details if required.
First, a general view of the infrabed:
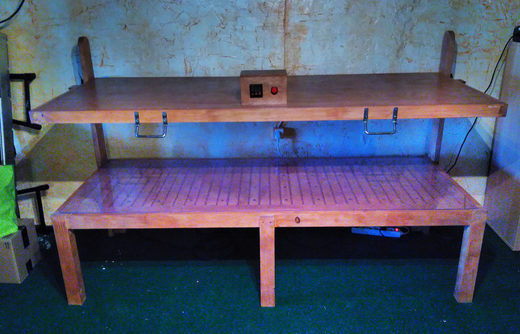
Structurally it is a bed (a frame + a board + 6 legs) to which two posts are attached. Those two posts hold the top panel.
Another general view from the side:
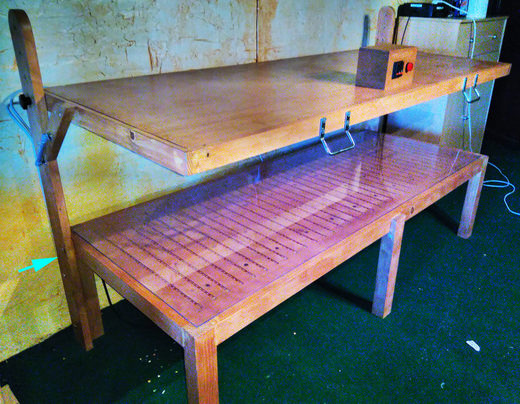
In the image above you can the the post better (blue arrow). Its section is roughly 2X4 (5cmX10cm)
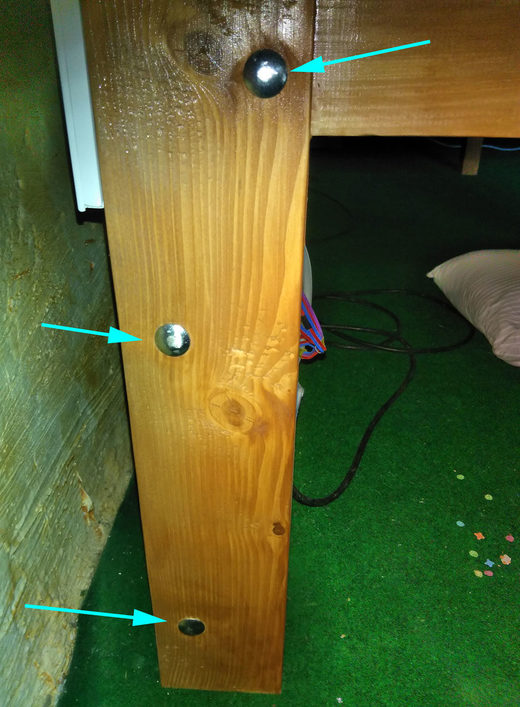
To make the transportation of the bed easier the posts are just bolted to the bed frame (and not glued), therefore they are easily removable as shown by the three blue arrows in the image below:
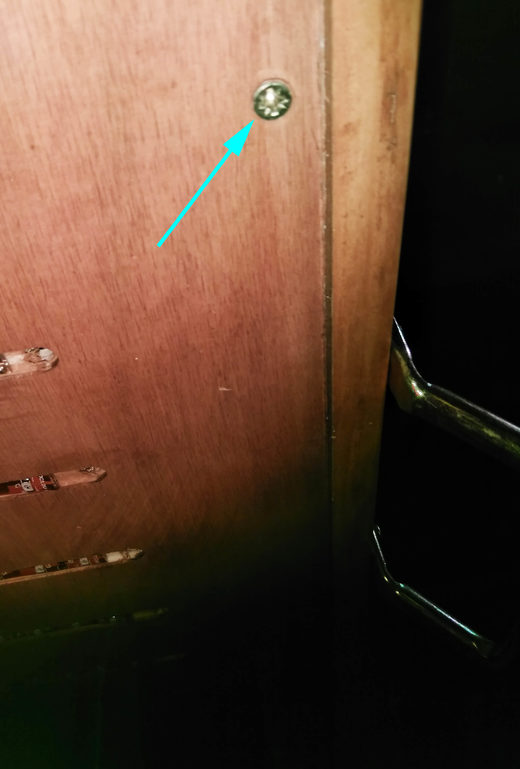
In the top half of each of the two posts, six equidistant holes have been drilled (blue arrows in the picture below). Those holes allow to adjust the height of the top panel with the knob screw (green arrow). This feature was implemented for our bed because we have people of various size, but it is not a necessary feature at all. If you design such a bed make sure the top panel is as close to you as possible because near infrared lights lose power very quickly over short distances.
Since the top panel is a bit heavy, gas springs (pink arrow) have been installed to ease the top panel lifting action: the top panel rotates around the knob screw while being pushed up by the spring:

This feature has to be improved because the gas springs are too weak (10kg-22lb) and don't have enough range (100mm-4 in). They will soon be replaced by car boot gas springs (60kg - 140lb force and 300mm - 1 ft range)
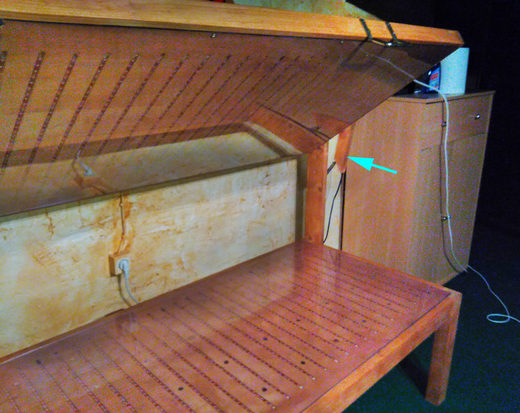
Below is a picture of the infrabed in an opened position. Notice the diagonal piece of wood (blue arrow) on which the top end of the gas spring is attached. This diagonal piece of wood acts as a stopper when the top panel is in a closed position.
Below is a picture of the control box:
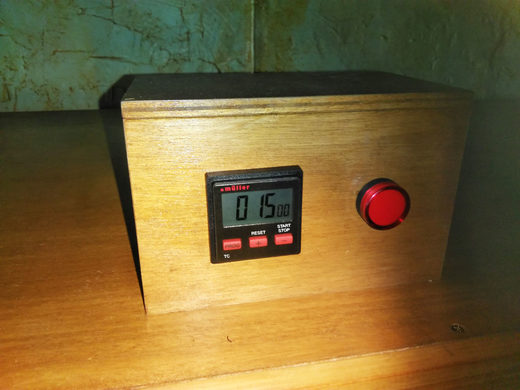
On the right is a red light that indicates that the bed is on. On the left is a timer that will run the bed for a given time. Here, it's programmed for a 15 minutes cycle.
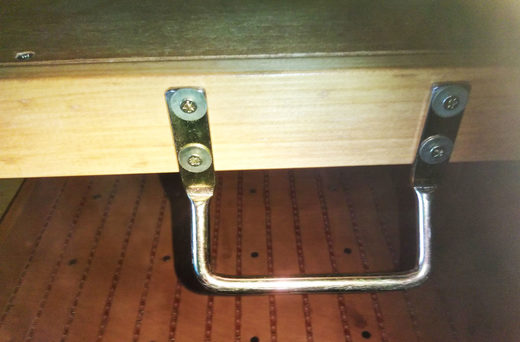
Below is a picture of one of the two handles, which have been installed to ease the lifting/dropping of the top panel.
The top panel and the bottom panels are made of plywood. 5/8'' - 15mm thick for the bottom and 3/8'' - 10mm thick for the top. In those plywood sheets, equidistant dados (grooves) have been made. There's about 42 mm ( 1 3/4 in) between each groove. As shown by the blue arrows, the grooves are 9 mm wide (1/3''). They also are 3mm deep (1/8''). There is a total of 36 grooves in each panel (top panel and bottom).
In those grooves we taped down near infrared LED strips. Below is a picture of a spool of near infrared LED:
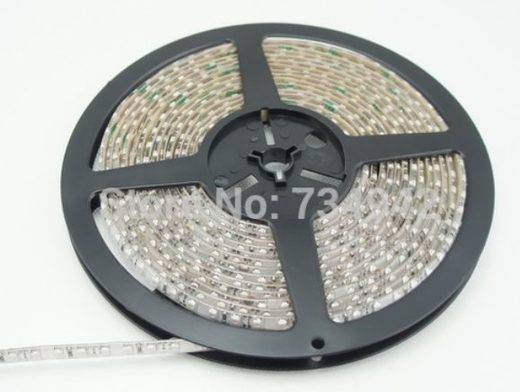
You can buy those spools from Aliexpress. Each spool is 5 meters (16ift) long. There are 60 LED per meter. We bought 9 spools for a total of 45 meters. We cut the strips in 72 sections of 60 cm (2 ft). So, our bed has a total of about 2600 LEDs for a total consumption that is around 200W.
The strip come with double side tape on the back which makes the installation very easy. You can pick one of three strip colors: black, yellow, white. We chose yellow because it matches the color of the bed frame (golden oak).
In addition to the LED strips, the bottom panel is equipped with neodymium magnets (N51), see blue arrow in the picture below:
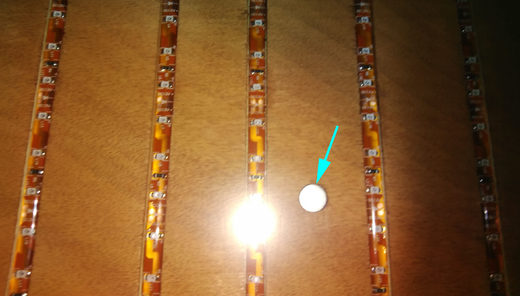
The whole bottom panel has a total of 48 magnets. The South pole of the magnets faces up. To determine the polarity of the magnet, you can use a compass, the south pole of the magnet will attract the North (usually red) handle of the compass.
Each magnet was mounted in a pre-dilled hole and glued down with epoxy resin.
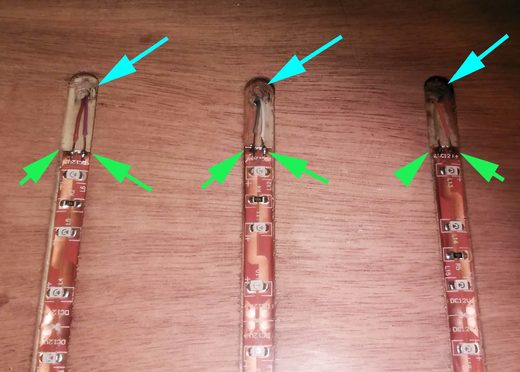
Below is a picture of the LED strip connection. At the end of each groove we drilled a hole (blue arrows). Through this hole we connected the section of LED strip to the power supply through two tiny wires that were directly soldered to the end of the LED strip (green arrows):
Now if we follow those tiny wires and go down the hole we end up beneath the bottom panel:
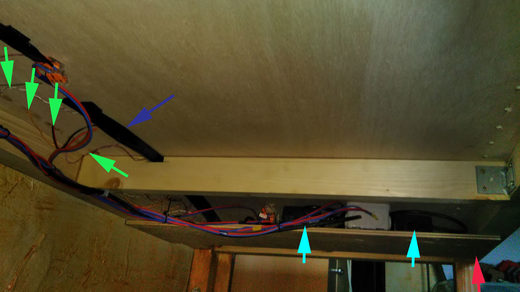
The image above shows the underneath of the bottom panel. The pairs of tiny wires are indicated by the green arrows. they are connected to the + and - rails (dark blue arrows). Those rails are, basically, stripped wires which were taped over for insulation (hence the black color) and they are connected to the power supply: two AC/DC converters (see blue arrows), one for each panel.
For convenience we installed a small shelf (see pink arrow) under the bottom panel in order to store various electrical components.
The LED strips are protected by plexiglass sheets that are mounted against the plywood panels. The top plexiglass and plywood sheets are screwed onto the top frame:

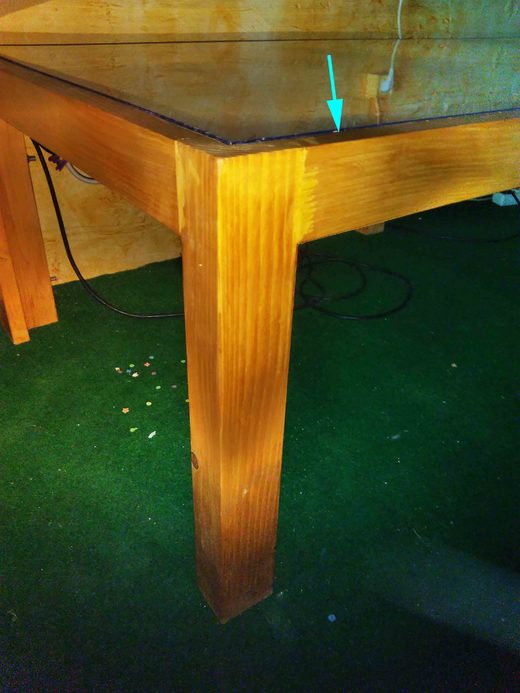
The bottom plywood and plexiglass are not screwed in place, they are just dropped into a rabbed (a kind of hedge groove) that was made all along the top inner edge of the bottom frame. In the image below, the blue arrow shows the edge of the plexiglass sticking above the frame. It's only about 1.5 mm (1/16''), while the plexiglass is 4mm (3/16'') thick:
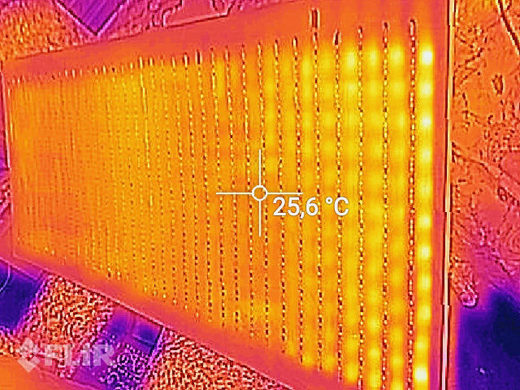
Now it's time to test the machine and see if it works. Here is a thermal imaging of the infrabed while it's off:
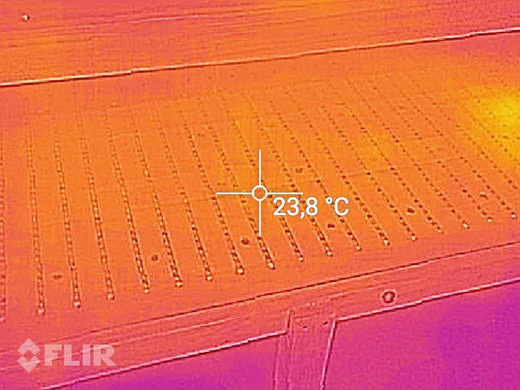
As you can see the temperature is homogeneous, the LEDs are not warmer than their environment. Below is a thermal picture of the infrabed while it's on and it's shining like a Christmas tree! So we know that all the LEDs are working fine!
Now we are ready for instant rejuvenation, time travel and much more
I didn't know that we would publish such a project, so I only have pictures of the finished product. But if one of you wants to build such a device, it's not too complicated. I provided some explanations in the photo tour below and I can provide extra details if required.
First, a general view of the infrabed:
Structurally it is a bed (a frame + a board + 6 legs) to which two posts are attached. Those two posts hold the top panel.
Another general view from the side:
In the image above you can the the post better (blue arrow). Its section is roughly 2X4 (5cmX10cm)
To make the transportation of the bed easier the posts are just bolted to the bed frame (and not glued), therefore they are easily removable as shown by the three blue arrows in the image below:

In the top half of each of the two posts, six equidistant holes have been drilled (blue arrows in the picture below). Those holes allow to adjust the height of the top panel with the knob screw (green arrow). This feature was implemented for our bed because we have people of various size, but it is not a necessary feature at all. If you design such a bed make sure the top panel is as close to you as possible because near infrared lights lose power very quickly over short distances.
Since the top panel is a bit heavy, gas springs (pink arrow) have been installed to ease the top panel lifting action: the top panel rotates around the knob screw while being pushed up by the spring:
This feature has to be improved because the gas springs are too weak (10kg-22lb) and don't have enough range (100mm-4 in). They will soon be replaced by car boot gas springs (60kg - 140lb force and 300mm - 1 ft range)
Below is a picture of the infrabed in an opened position. Notice the diagonal piece of wood (blue arrow) on which the top end of the gas spring is attached. This diagonal piece of wood acts as a stopper when the top panel is in a closed position.
Below is a picture of the control box:
On the right is a red light that indicates that the bed is on. On the left is a timer that will run the bed for a given time. Here, it's programmed for a 15 minutes cycle.
Below is a picture of one of the two handles, which have been installed to ease the lifting/dropping of the top panel.
The top panel and the bottom panels are made of plywood. 5/8'' - 15mm thick for the bottom and 3/8'' - 10mm thick for the top. In those plywood sheets, equidistant dados (grooves) have been made. There's about 42 mm ( 1 3/4 in) between each groove. As shown by the blue arrows, the grooves are 9 mm wide (1/3''). They also are 3mm deep (1/8''). There is a total of 36 grooves in each panel (top panel and bottom).
In those grooves we taped down near infrared LED strips. Below is a picture of a spool of near infrared LED:
You can buy those spools from Aliexpress. Each spool is 5 meters (16ift) long. There are 60 LED per meter. We bought 9 spools for a total of 45 meters. We cut the strips in 72 sections of 60 cm (2 ft). So, our bed has a total of about 2600 LEDs for a total consumption that is around 200W.
The strip come with double side tape on the back which makes the installation very easy. You can pick one of three strip colors: black, yellow, white. We chose yellow because it matches the color of the bed frame (golden oak).
In addition to the LED strips, the bottom panel is equipped with neodymium magnets (N51), see blue arrow in the picture below:
The whole bottom panel has a total of 48 magnets. The South pole of the magnets faces up. To determine the polarity of the magnet, you can use a compass, the south pole of the magnet will attract the North (usually red) handle of the compass.
Each magnet was mounted in a pre-dilled hole and glued down with epoxy resin.
Below is a picture of the LED strip connection. At the end of each groove we drilled a hole (blue arrows). Through this hole we connected the section of LED strip to the power supply through two tiny wires that were directly soldered to the end of the LED strip (green arrows):
Now if we follow those tiny wires and go down the hole we end up beneath the bottom panel:
The image above shows the underneath of the bottom panel. The pairs of tiny wires are indicated by the green arrows. they are connected to the + and - rails (dark blue arrows). Those rails are, basically, stripped wires which were taped over for insulation (hence the black color) and they are connected to the power supply: two AC/DC converters (see blue arrows), one for each panel.
For convenience we installed a small shelf (see pink arrow) under the bottom panel in order to store various electrical components.
The LED strips are protected by plexiglass sheets that are mounted against the plywood panels. The top plexiglass and plywood sheets are screwed onto the top frame:
The bottom plywood and plexiglass are not screwed in place, they are just dropped into a rabbed (a kind of hedge groove) that was made all along the top inner edge of the bottom frame. In the image below, the blue arrow shows the edge of the plexiglass sticking above the frame. It's only about 1.5 mm (1/16''), while the plexiglass is 4mm (3/16'') thick:

Now it's time to test the machine and see if it works. Here is a thermal imaging of the infrabed while it's off:
As you can see the temperature is homogeneous, the LEDs are not warmer than their environment. Below is a thermal picture of the infrabed while it's on and it's shining like a Christmas tree! So we know that all the LEDs are working fine!
Now we are ready for instant rejuvenation, time travel and much more
 Great work!!!


